A broken cable can be one of the most frustrating problems in car repair. Sometimes the fault is obvious, sometimes it’s hidden deep in the wiring harness. But how do you find the culprit? The answer: Test the cable for continuity! This article explains step by step how to effectively identify and fix cable breaks, from simple home remedies to professional diagnostic tools.
What Does “Test Cable for Continuity” Mean?
“Testing cable for continuity” means determining whether an electrical current can flow through a cable unhindered. “Continuity” means an intact circuit. No continuity indicates a cable break or another interruption in the circuit. For a car mechanic, this test is essential to diagnose and fix electrical problems in the vehicle. From an economic point of view, performing this test correctly saves time and money by avoiding unnecessary parts replacement. Dr. Karl Heinz Müller, author of “Automotive Electrical Systems for Professionals,” emphasizes: “Continuity testing is the be-all and end-all of troubleshooting in vehicle electrical systems.”
How to Test Cable Continuity: A Step-by-Step Guide
Testing for continuity is easier than you think. Here’s a guide on how to proceed:
- Safety first: Disconnect the battery before you start working on the vehicle’s electrical system. This prevents short circuits and protects you from electric shocks.
- Identify the cable: Find the cable you want to test. If necessary, use your vehicle’s wiring diagram.
- Choose the right tool: A multimeter is the standard tool for this task. Alternatively, you can also use a test light.
- Performing the test with a multimeter: Set the multimeter to the resistance measurement range (ohmmeter). Touch the two ends of the cable with the measuring probes. A low resistance (close to zero) indicates continuity. A high resistance or “OL” (Open Loop) indicates a cable break.
- Performing the test with a test light: Connect one end of the test light to ground and the other end to one end of the cable being tested. If the light illuminates, there is continuity.
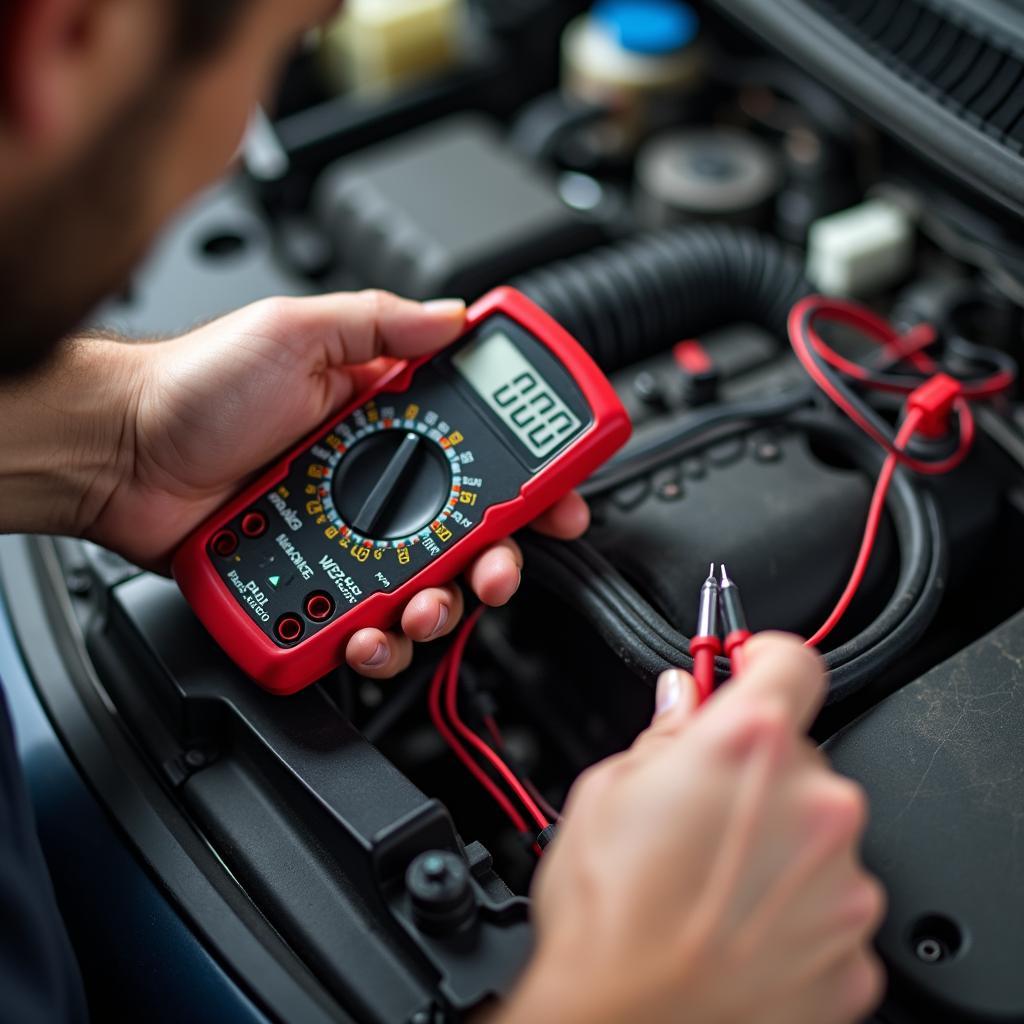 Checking car cable continuity with a multimeter
Advantages of Continuity Testing
Continuity testing offers numerous advantages for anyone working on vehicle electrical systems:
- Quick fault diagnosis: You can quickly and easily determine whether a cable is defective.
- Targeted repair: You only replace the parts that are actually defective, saving time and money.
- Prevention of consequential damage: By detecting cable breaks early, you can prevent consequential damage to other components.
Common Problems and Solutions
Sometimes, continuity testing may show continuity despite a cable break. This can be the case with corroded contacts, for example. Clean the contacts thoroughly and repeat the test.
Further Useful Tips
- Use a wiring diagram: A wiring diagram helps you identify the correct cable and understand the circuit.
- Use quality tools: A high-quality multimeter provides precise measurement results.
- Regular checks: Regularly check the cables for damage to identify potential problems early on.
Similar Questions
- How do I check the function of a fuse?
- How do I find a short circuit in a car?
- What tools do I need for car repair?
More Information on autorepairaid.com
Visit our website autorepairaid.com for more helpful articles and instructions on car repair. There you will also find information about our diagnostic tools and training materials.
Testing Cable Continuity: Conclusion
Continuity testing is an indispensable tool for troubleshooting in vehicle electrical systems. With the right tools and a little practice, you can quickly and reliably identify and fix cable breaks. If you need further assistance, our car repair experts are available around the clock. Contact us via WhatsApp: + 1 (641) 206-8880 or by email: [email protected]. We’re happy to help!